Backtest without a Stop to Find the Optimal One
By Dave Mabe
Consider two long trades from the same day in the backtest for a strategy I trade:
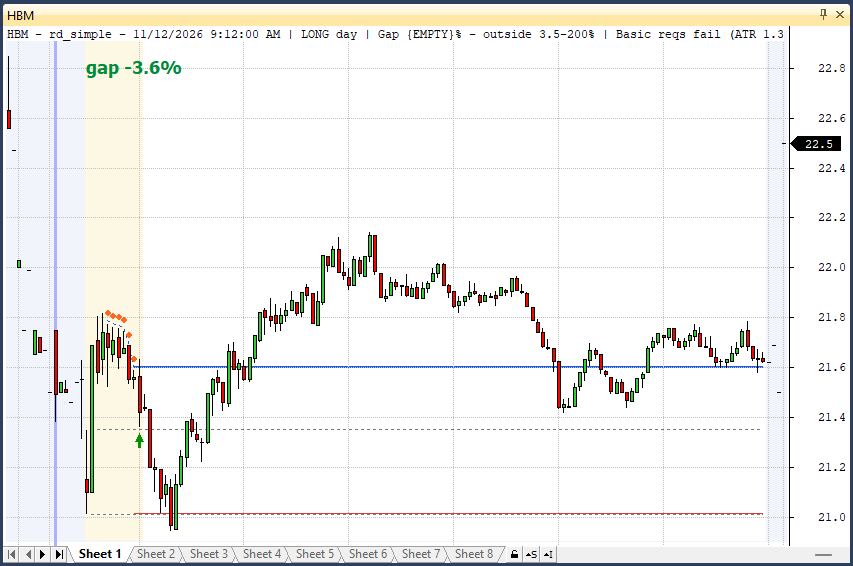
Long in HBM at the green arrow, but then it stops out quickly (the red line), and price quickly rebounds after the stop-out. Frustrating!
Now look at QNT on the same day:
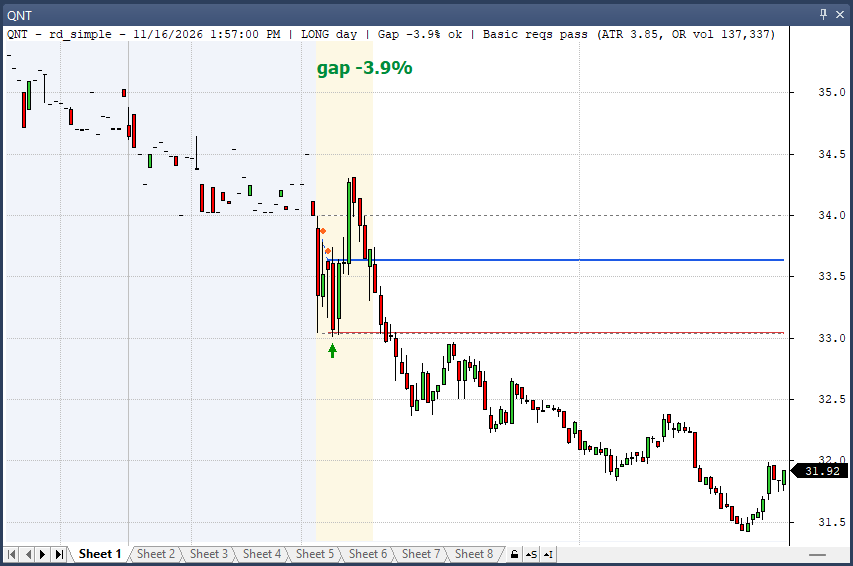
Long at the green arrow, stopped out after roughly the same amount of time, but then price continues going down after the stop-out.
It's easy to look at these charts after the fact to determine what the best stop could have been.
But looking at just these two, you'd come up with very different answers.
Now look at the two charts side by side, but with MAE (maximum adverse excursion) plotted (the orange line).
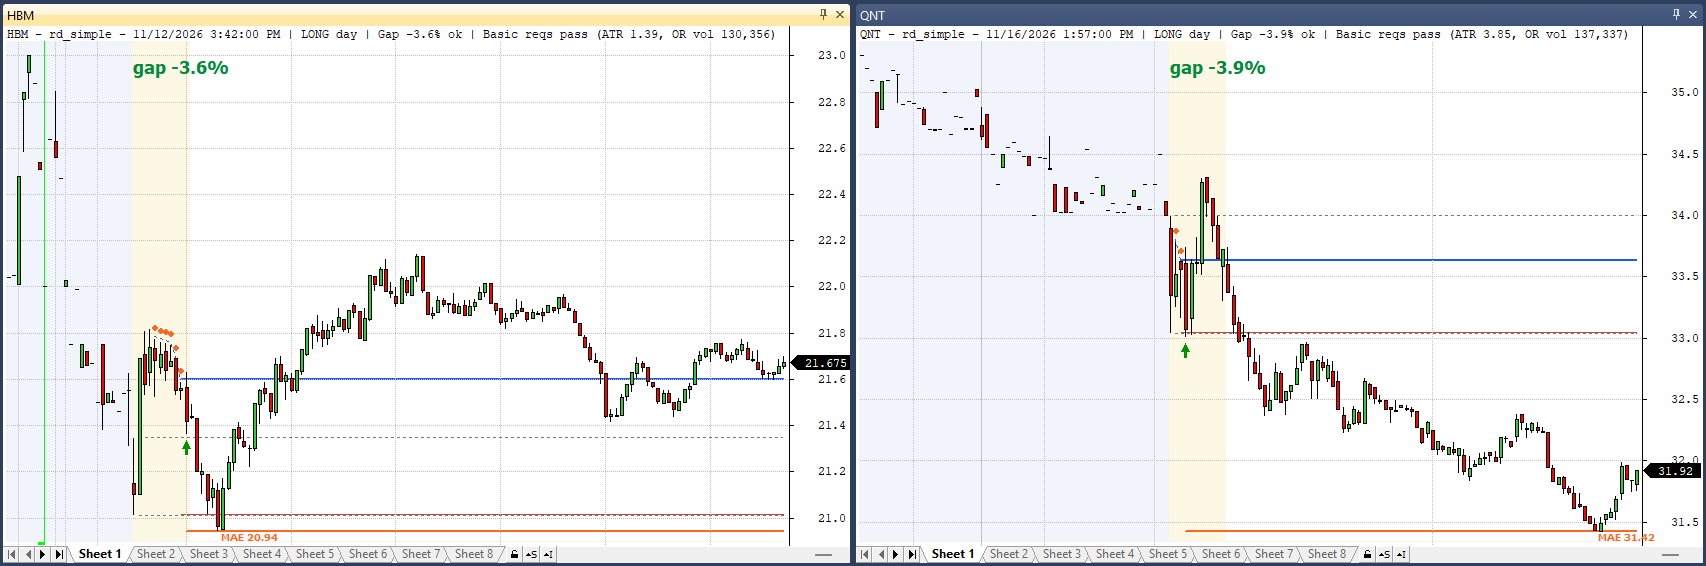
This is the point at which the trade was least profitable during the day (ignoring the stop).
When you backtest with a stop (the red line in these charts), the worst P&L during the trade is the stop price.
So your backtest treats these two trades as basically the same outcome.
But remove the stop, and they are very different trades!
One ends up profitable at the end of the day, and the other is a huge loser.
The stop in your backtest hides this difference from you and your analysis.
Imagine taking the trade in HBM, getting stopped out immediately, only to see it rebound - and not being frustrated by that!
Next week, I'll share how I use the Strategy Cruncher to find the best stop across the entire backtest.
When you select a stop this way, any particular trade doesn't matter, because you'll be confident you're using the best stop across all your trades.
-Dave
P.S. See the charts above? I did all that with Claude without coding anything, using the skills included with MabeKit. Hit reply if you want to learn more about the skills.